Step by Step Process of Creating a Digital Catalogue for Your Business


Ecommerce


32 week ago — 11 min read
Before diving into the detailed process of creating a digital catalogue, let's first ensure we have a solid grasp of the fundamentals. This will help you understand everything more clearly and effectively.
What is a Digital Catalogue and its Types?
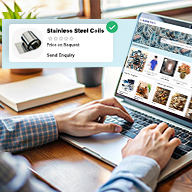
The textbook definition of a digital catalogue is that it is a website or computer file used to provide examples of a person's work or products offered by a business in a digital format, which can be easily accessed by prospective customers.
However, this definition can be somewhat confusing. Let's break it down into simpler terms: a digital catalogue is a website. But not all websites qualify as digital catalogues. Only those websites with specific characteristics can be classified as digital catalogues.
Here are the criteria:
-
The website should showcase information about the business's product or service offerings.
-
The website should be able to take orders (B2C) or handle inquiries (B2B) for the business.
-
The website must also provide information about the business itself.
Types of Digital Catalogues
- Lead: A digital catalogue used by a business to handle inquiries from prospective customers.
- Order: A digital catalogue used by a business to take orders from customers.
- Lead + Inquiry: A digital catalogue that handles orders from retail customers (B2C) and inquiries from bulk buyers (B2B) simultaneously.
- Order + B2B Bulk Ordering: A digital catalogue that takes orders from retail customers (B2C) and bulk buyers (B2B), accommodating bulk buyers' needs such as special discounts, credit, and minimum order quantities (MOQ).
Why Should You Create a Digital Catalogue?
As individuals, we rely on various digital solutions daily, such as online shopping, bill payments, and food ordering, because they are convenient and easy to use. This same convenience applies to your customers, and it's not just limited to retail selling (B2C). Nearly half of global B2B business is now conducted digitally.
By not creating a digital catalogue, you make it difficult for your customers to do business with you and even find you. If customers can't find you or conduct business with you, your chances of growing or sustaining your business are slim. Therefore, it is crucial for every business to have a digital catalogue, enabling potential customers to easily find and do business with you.
How to Create a Digital Catalogue?
Step 1: Log into your account and click on "Online Store" in the top navigation. If you haven't created an account yet, please sign up and create one; it will only take a few minutes. Clicking on “Online Store” will load a new page, on this page click on “Convert Now”.


Step 2: An overlay (PopUp) will appear, on the overlay select an appropriate response to three simple questions.

Step 3: Another overlay will appear, on this overlay select a suitable design template of your choice

Step 4: Another overlay will appear, on this overlay there are two inputs fields that is store name and store URL
Store Name: In most cases it is the name of the businesses, however if you operate a popular brand then you can also create the digital catalogue in the name of your brand, that is you can replace the business name with brand name if required.
Store URL: URL is something which a user types in the browser to open a website, for example if you have to open Google’s website then you type www.google.com in the browser and Google’s website opens up. Similarly, if someone has to open your website then what should they type is what you have to input here. You must take the following points into considering while creating your digital catalogue’s URL
-
Only alphabets and numbers are permitted, no space or any other special character should be inputted.
-
The maximum length is 25 characters, so in case the name of your business is quite long then you must edit it a bit to ensure the length is not more than 25 characters.
-
It is possible to use your own domain for the digital catalogue, however it should be done once the digital catalogue is totally ready to be revealed to the customers.
After adding the store name and store URL click on “Create Store” to move to the next step.

Step 5: The page will reload and the seller panel of the digital catalogue will be revealed, to complete the next steps click on the “Home” shaped icon on the top of the screen to navigate to the home screen of the seller panel. Here all the remaining steps are listed. In order to make this process of creating digital catalogue easy we have provided a flexibility in the system which allows you to complete any of the remaining steps as per your choice, which means it is not necessary to complete them in the order they are listed.
The next step listed on the homepage of your digital catalogue will be “Create Your Catalogue”, which means you have to upload a minimum of one product to your digital catalogue. There is no restriction as such that you can only upload one product, you can upload as many products as you want, however the minimum is one product to complete the digital catalogue creation journey.
Now to upload the products on your digital catalogue click on “Create Your Catalogue” and you will be redirected to the product upload page. On this page, you have to input the required information to upload the product. In order to understand the step by step process of uploading products, please review the below linked tutorial videos.
- Uploading Products: https://youtu.be/GD5M4rQLSXg?si=yT8JMxO2HBASrS5Z
- Uploading Products in Bulk: https://youtu.be/WNRqpMyF2Xk?si=xRVba_URMzjQoLqK


Step 6: After uploading the product click on the “Home” shaped icon on the top of the screen and navigate back to the home page of the seller panel of your digital catalogue. On the homepage you will notice that the next step is “Set-up Shipping Zone” click on the blue button and you will be navigated to the shipping zone page and an overlay will load up.
As part of the digital catalogue setup journey, on the overlay you have to only update fields, which are “Estimated Time” and “Charges By”. You can input a desired value in both the fields and after inputting the values please click on “Update” to complete the step.
Now you must be certainly wondering, what is a "Shipping Zone" and why are we not setting it up entirely. Shipping Zone is used to define the rules for charging shipping or delivery fees from the customer. So in simple terms, using shipping zone you can define what shipping fee is to be charged from the customer if the the order has to be delivered to location A or location B and it also allows you to define the area where you would like to deliver the order and cash on delivery as a payment solution is to be provided or not to be provided to which locations. Why are we not setting it up entirely, because setting up shipping zone requires clarity on the delivery rates, therefore after completing the digital catalogue setup process you can sign up with one of the logistic operators, linked with your digital catalogue and they will provide you the location wise rate list, one you have that information you will be able to setup the shipping zone.


Step 7: After updating the shipping zone, click on the “Home” shaped icon on the top of the screen and navigate back to the homepage of the seller panel of your digital catalogue. The next action item is “Get Paid”, click on the blue button and you will be redirected to the payment management page.
On the payment management page, you will noticed there are a number of payment methods, you should scroll down and click on “Cash On Delivery”, which will open the Cash on Delivery tab, here click on the button to change it to “Enabled” which will enable the “Cash On Delivery” payment option on your digital catalogue.
If you are curious why we have enabled cash on delivery and why we are not enabling other payment gateways. The request for activation of payment gateway should only be submitted once the digital catalogue is properly setup and is ready to be presented to the public, however at this stage you have just started setting up the digital catalogue, so if you submit the request now, it will certainly get rejected and you will end up wasting a lot of valuable time and energy.


Step 8: After enabling "Cash On Delivery" in the left navigation, click on “My Store” and then click on “Themes” which will open the theme management page, on this page click on the “Actions” button the right side of the screen, a dropdown will appear, click on “Apply” to apply the design themes selected in step 4.

Step 9: Next click in the left navigation click on “Navigation”, you will find it slightly below the “Themes” option. You will be redirected to the Navigation management interface, here you will have to create navigation for your digital catalogue. Please refer to the tutorial video to understand in detail the process of setting up navigation.
Set Up Navigation: https://youtu.be/N0ZcjhNonB8?si=8PSeU1Q2-MAuwESb

Step 10: After setting up the navigation, click on “Store Preview” in the left navigation, it is slightly above the “Themes” option in the left navigation. Clicking “Store Preview” will open the admin preview in another tab, here you have to upload banners and do the required colour customization to the digital catalogue. Please refer to the tutorial video to understand the process of uploading banners.
Uploading Banners: After uploading the banner, click on the “Save” and “Publish” button on top of the screen on Store Preview, which will conclude the digital catalogue creation process.


Please also refer to the below detailed tutorial video, to better understand the process.
Posted by
GlobalLinker StaffWe are a team of experienced industry professionals committed to sharing our knowledge and skills with small & medium enterprises.
View GlobalLinker 's profile


Most read this week

Comments
Share this content
Please login or Register to join the discussion